
Drupal 8 RestWS for Dummies (Quickstart Guide)
Documentation for Drupal 8 is still really lacking. There is SOME documentation out there, but in typical Drupal 8 fashion, you have to sift through all of the pages and all of the content to find exactly what is relevant to you. This guide is an attempt to get you quickly started.
This guide is for dummies, but it also assumes you know the basics of Drupal 8. Specifically, you should be comfortable getting an installation of Drupal 8 up on your own, you have you’re comfortable editing text (config) files, and you have basic site-building skills (Creating content types, creating views, etc).
Before we get started, I want to say that, when I am making an API for a new app, I want to make it FAST. I am comfortable working with the MEAN stack (using MongoDB + Express to run your API server), but I consider myself fairly proficient in Drupal, so why reinvent the wheel every time manually writing an API when Drupal already does a great job at assembling and delivering data? I’m able to get my API working with GET requests in less than 5 minutes, and POST requests in less than 15 minutes.
OK, enough small talk – lets get started.
I use Pantheon (http://pantheon.io) to spool up quick D8 sites. It’s free if you’re only created sandboxes, and it’s no hassle, so it’s perfect for testing. I’m not going to go into details, but to get started, you will need to setup your D8 installation with the following modules:
- Rest UI (https://www.drupal.org/project/restui)
- Aaaaand that’s it!
Rest UI gives a nice interface to handle your endpoints. Prior to this, you would have to write our own yml files to do this. Rest UI makes this much easier.
Configuration
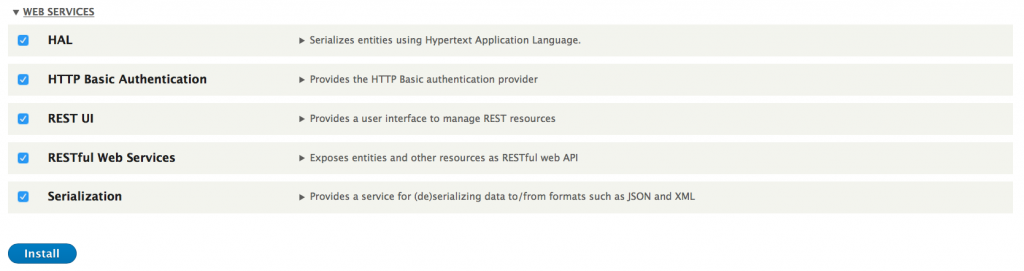
Log into your Drupal admin, go to the modules page (/admin/modules), and scroll all the way to the bottom and enable all of these Web Services modules.
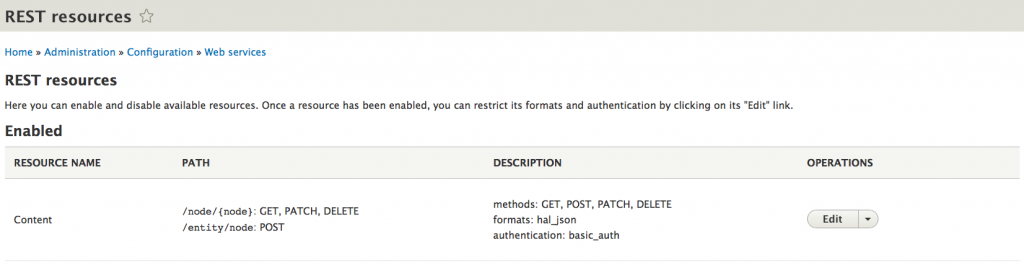
Now, navigate to the Rest UI admin page (/admin/config/services/rest) and make sure you enable the Resource Name “Content”. It was enabled by default on my install, looking like this:
If your Rest UI screen doesn’t look like that, look for “Content” and click the “Enable” button on the same row as it with the following settings (you can checkmark everything on if you really want to):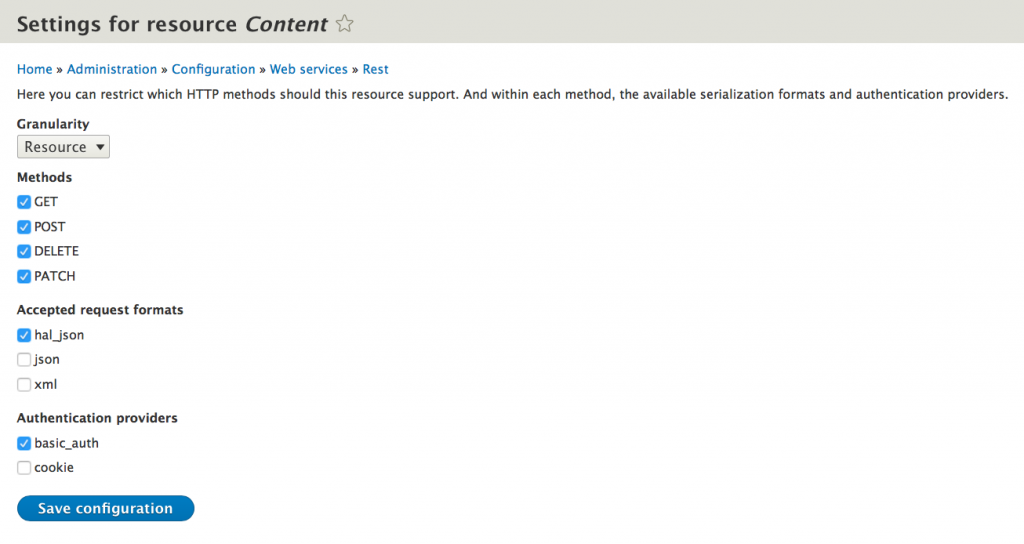
Your first GET request
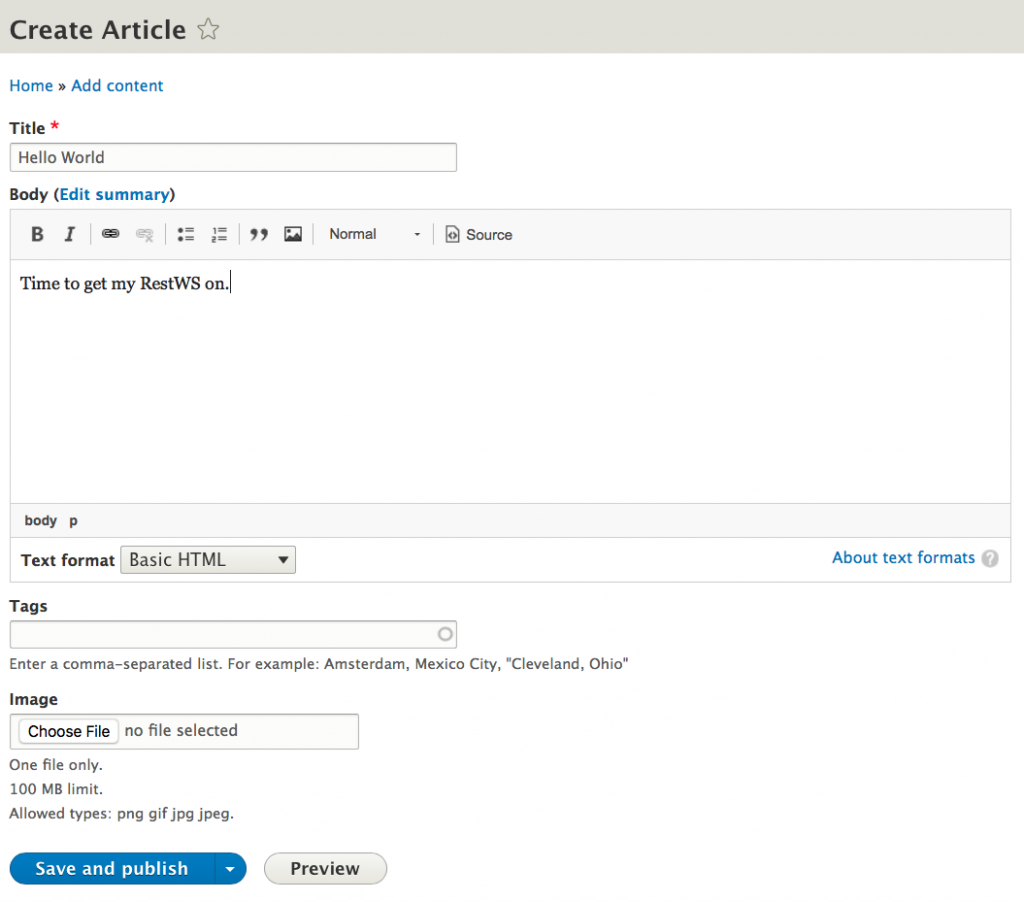
Before you make your first GET request, you have to have something to GET first! Create an article (/node/add/article) before you do this. Fill it with any information you like.
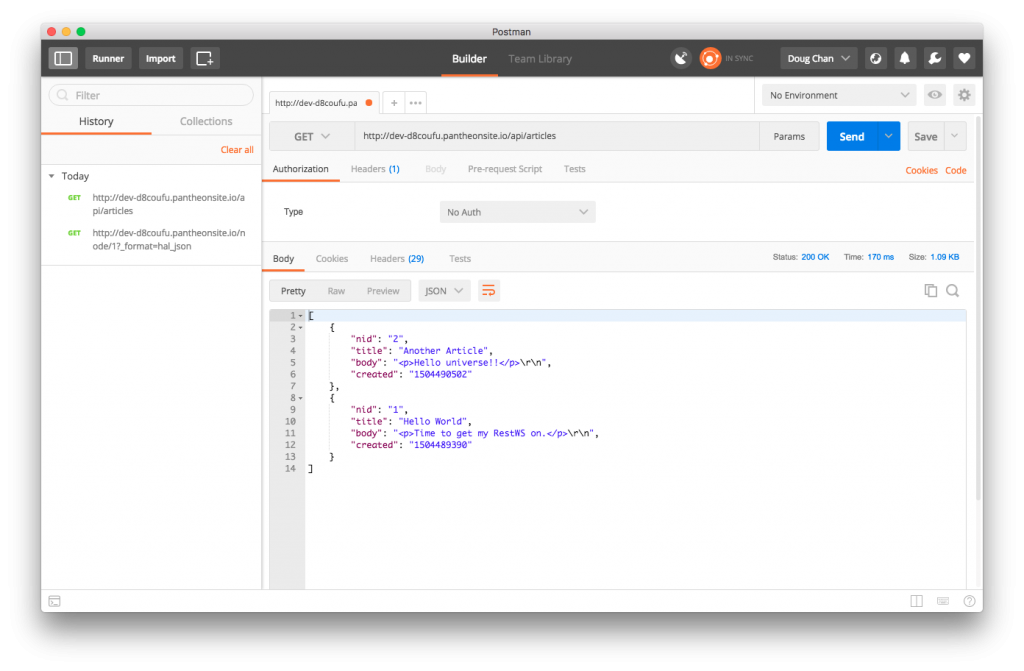
Next, we’re going to use Postman (https://www.getpostman.com) to test our GET request. Simply copy the URL of the node you just created, and follow it with ?_format=hal_json – e.g. /node/1?_format=hal_json – your Postman should look a lil something like this:
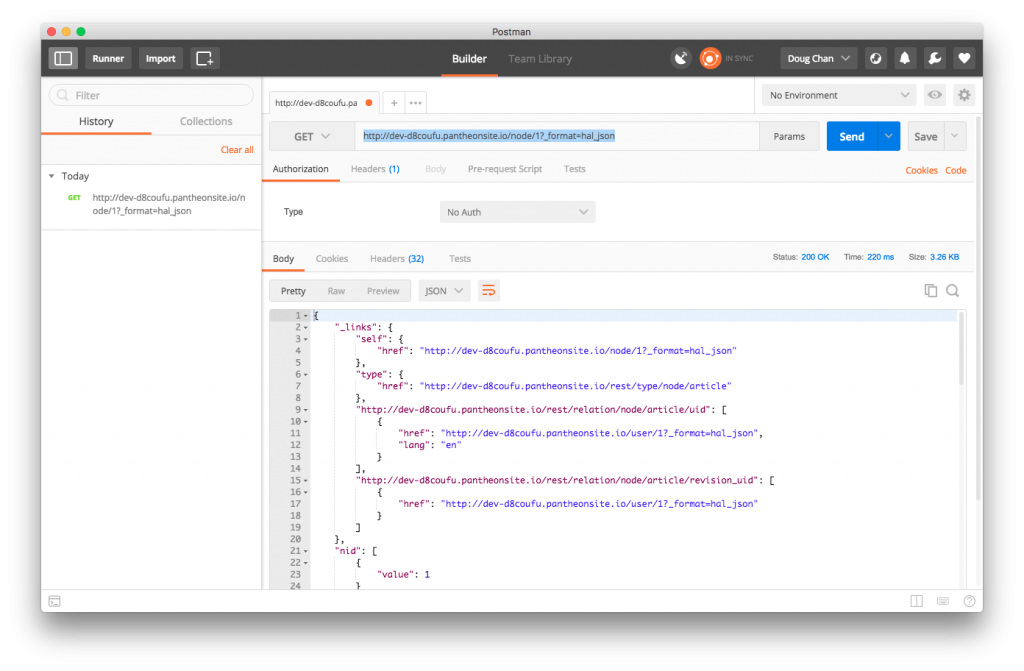
Great! You got your JSON. Of course, getting the details for just one piece of content can only get you so far, so that’s what Views is great for. The great thing about Views in Drupal 8 is that Rest Export is built into core. When you navigate to create a view (/admin/structure/views/add), you’ll see what I mean:
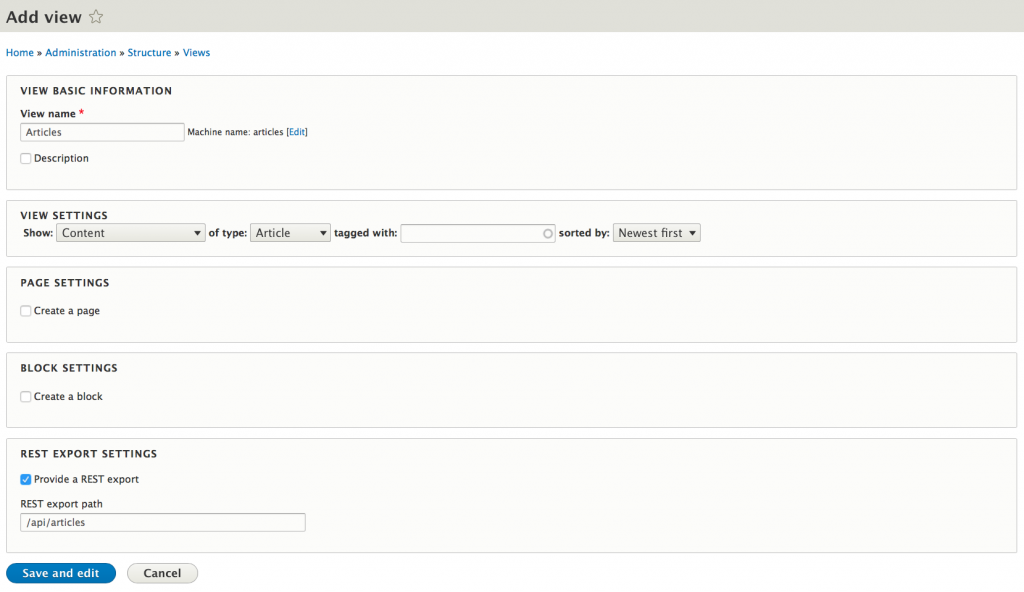
(mistake in the screenshot, do not start the path with a ‘/’)
After you create this view, the default format is to display the entire entity. I didn’t like this in particular, so what I did was change it to “fields” to get more control of what you’re going to show. Follow the following screenshots:

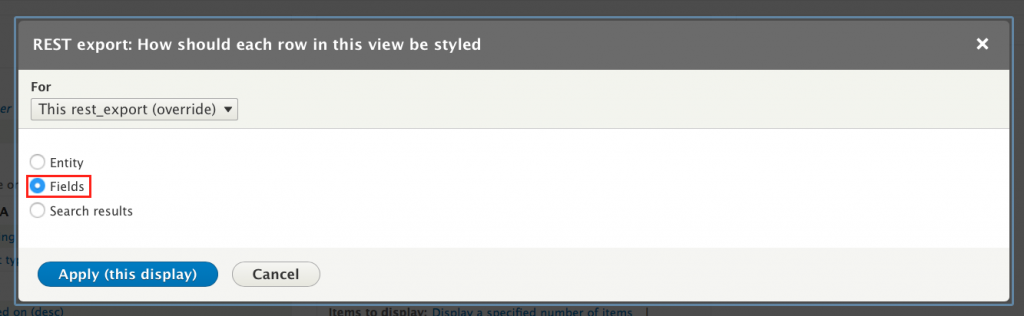
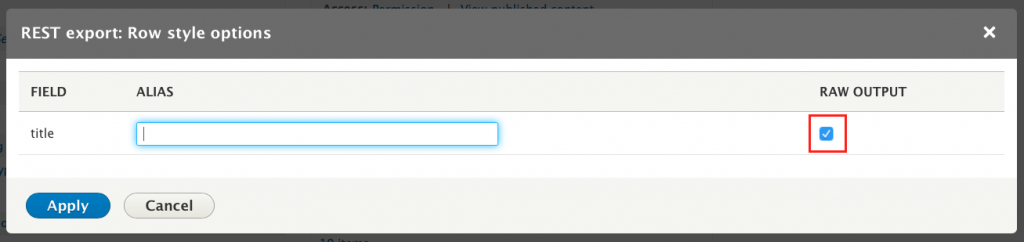
In my experience, it was more helpful to checkmark “Raw Output” in most cases.
Now, you’ll probably want to get more than just the titles of the articles, so just do like you normally would in a Views displaying in Fields format and Add whatever fields you like. 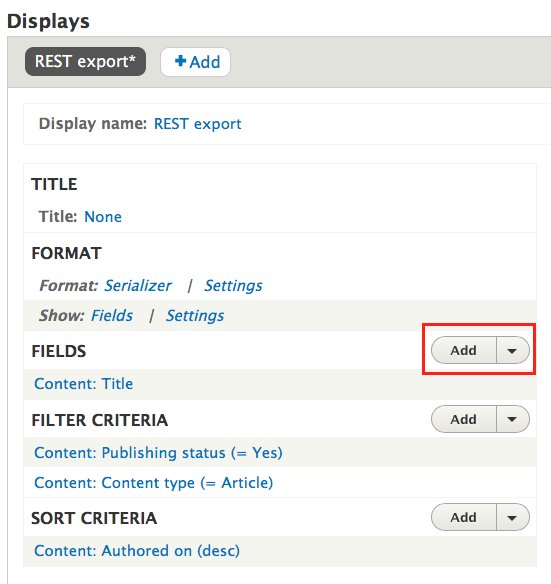
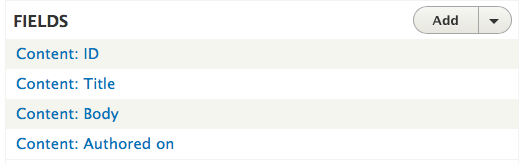
These are the fields I ended up:
And don’t forget to click Save!
Add some more pieces of content (articles) if you so desire. When you point your Postman to the new Views URL you just created, you should see something like this:
Your first POST request
Now, this is where it gets a little tricky. Drupal 8 has some specifics to follow when POSTing. Two important things to take note are:
- You need user authentication. In this example, we’ll use the admin user, but on a real site, you’ll probably want to create a new Role for this with the specific Permissions to do this.
- The HAL+JSON object you send has to follow a set of guidelines and is perhaps not as simple as building your own API would be using MongoDB + Express, but once you get comfortable with it, it is not a problem at all.
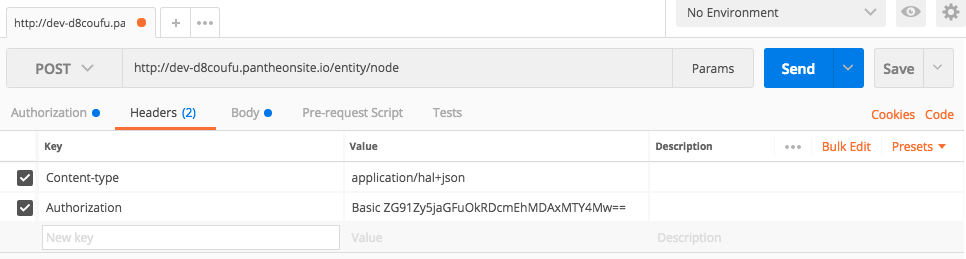
That said, in Postman, change the operation to POST, set your URL to /entity/node, and set up your authorization with the following settings.
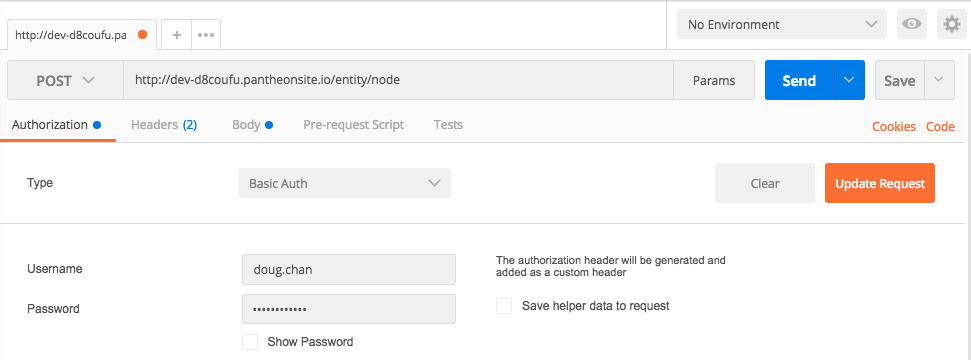
Of course, you’ll want to use your own username and password. Then hit the Headers tab and set the following (the Authorization header should be filled in for you automatically if you followed the previous step).
Finally, set the JSON to deliver. Again, follow the data from the screenshot.
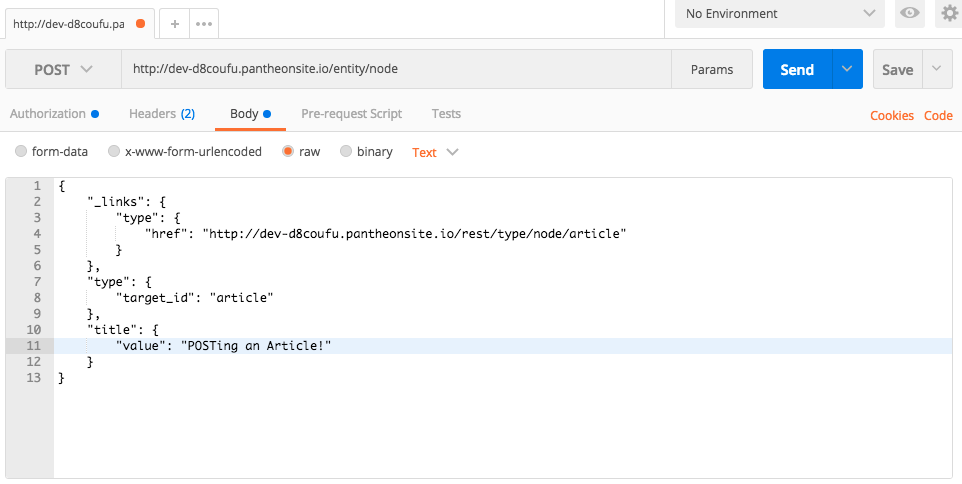
Here’s that JSON for you to copy/paste:
{

"_links": {

"type": {

"href": "http://dev-d8coufu.pantheonsite.io/rest/type/node/article"

}

},

"type": {

"target_id": "article"

},

"title": {

"value": "POSTing an Article!"

}

}
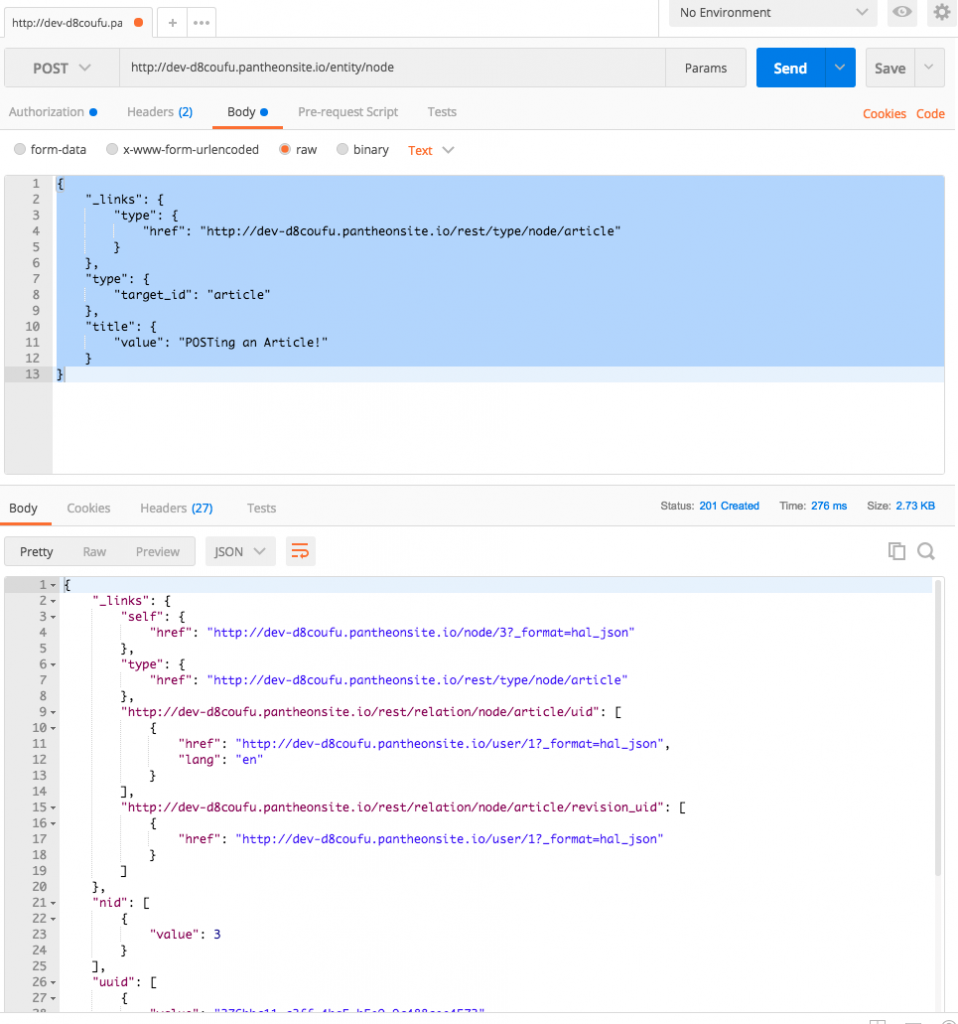
Now all you have to do is to click the Send button! If all goes well, you should get JSON returning the entity you just created as a result of the POST request.
Congrats! You now know how to GET and POST to your Drupal 8 server. In my next article, I will cover using Angular CLI to use this D8 server. Long story short, D8 needs some CORS configuration (hint: copy default.services.yml to services.yml and edit the CORS settings there) and Angular CLI needs a bit of tweaking to POST data using HAL+JSON (hint: use http.request() instead of http.post() and use the JSON.stringify() as the data you send).
Enjoy!