
Drupal 7 and RESTWS with Basic Authentication – Getting Started (Tutorial)
I couldn’t find a good tutorial on how to do this from the ground up, so here is a definitive one that’ll get you started.
For this tutorial, you will need
- Drupal 7 set up and ready to go (I’m using a local server)
- The Following Modules Installed: RESTful Web Services & Entity API (required by restws)
- Your favorite REST client for testing. I’m using “Advanced REST Client” (Google Chrome Extension)
- A basic-medium knowledge of already how to use Drupal 7 (installing, enabling modules, etc.)
Ok, let’s get started! Here’s a basic new installation. Yay.
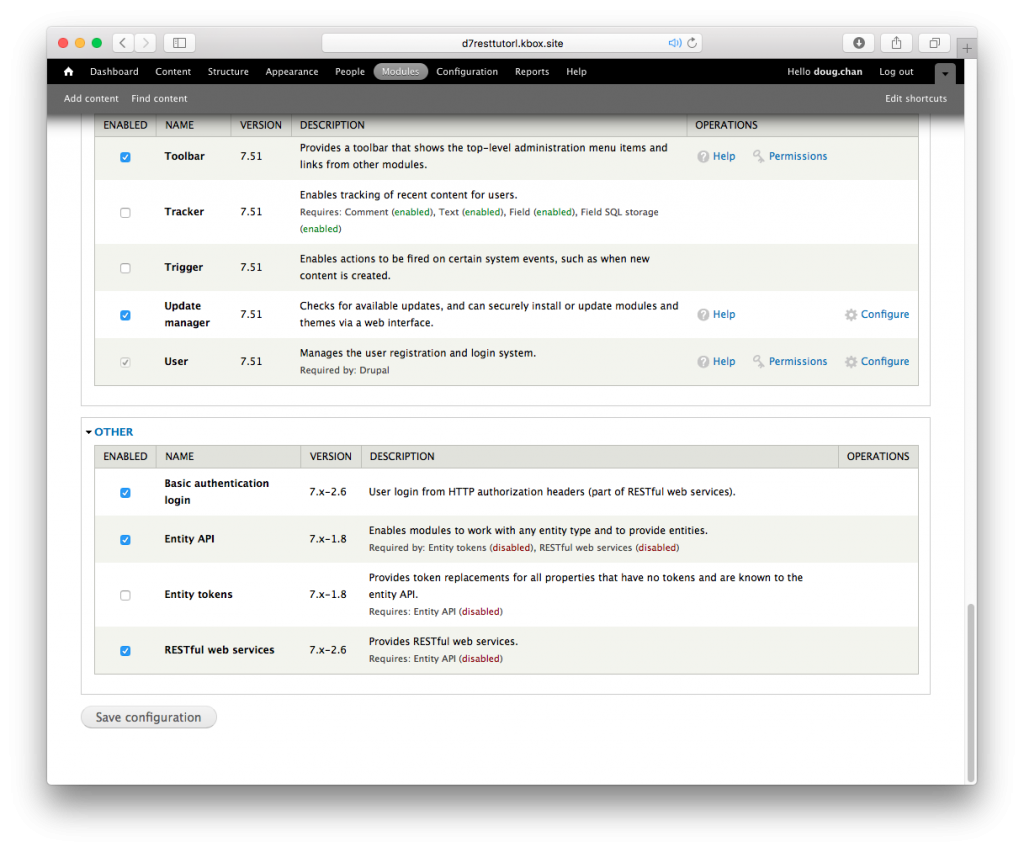
Go to the “Modules” page. After you’ve installed the two modules listed above, the screen should look something like this. Enable the following modules shown below under “OTHER”:
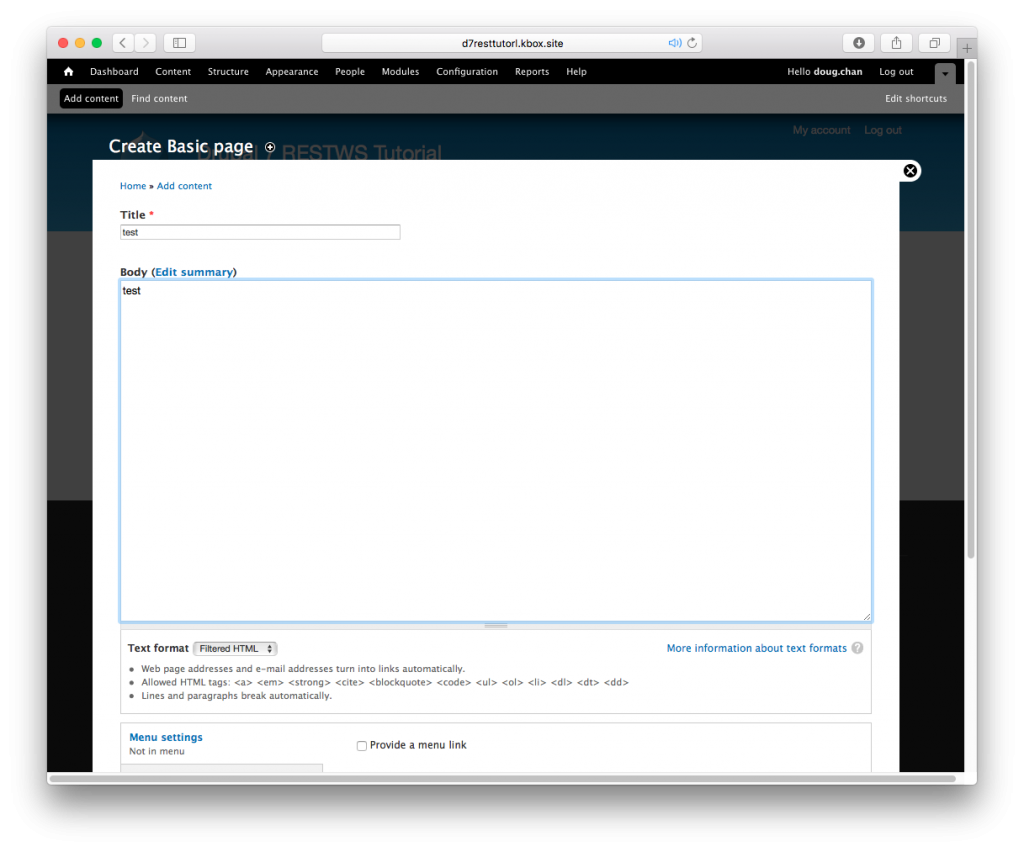
Create a node of whatever. I’m going to make a Basic Page with the following fields. Since this is the first node you create (theoretically), this will automatically be saved as http://<server>/node/1
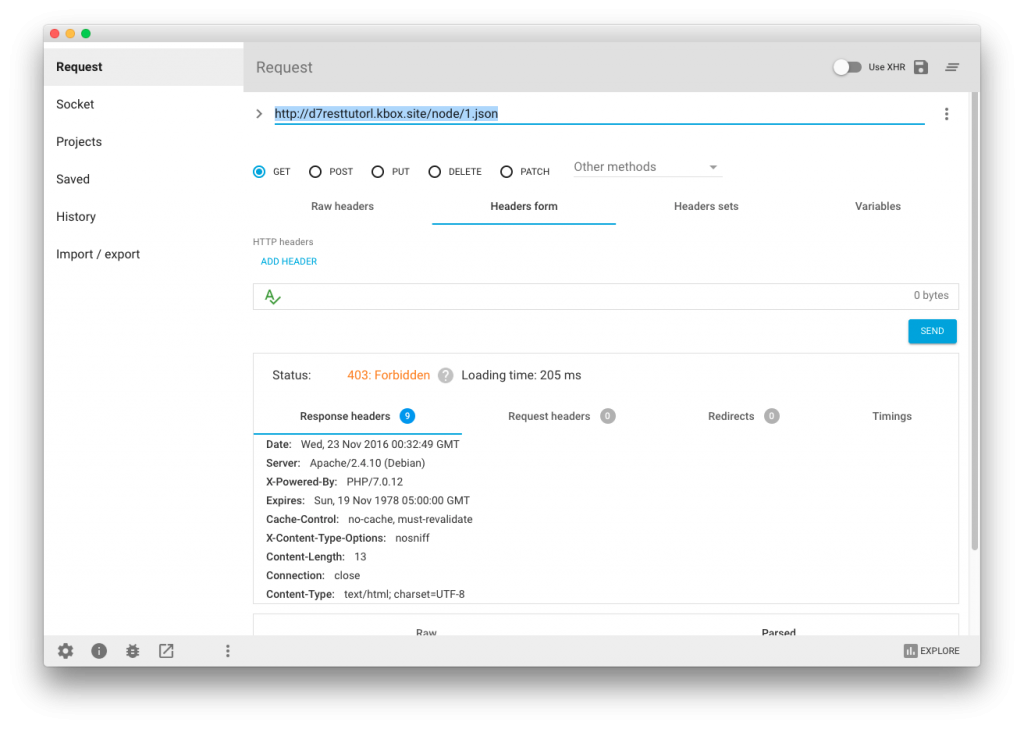
The correct way to access this via REST is the following URL: http://<server>/node/1.json (note the .json at the end). See below. Oh no! I got a 403!
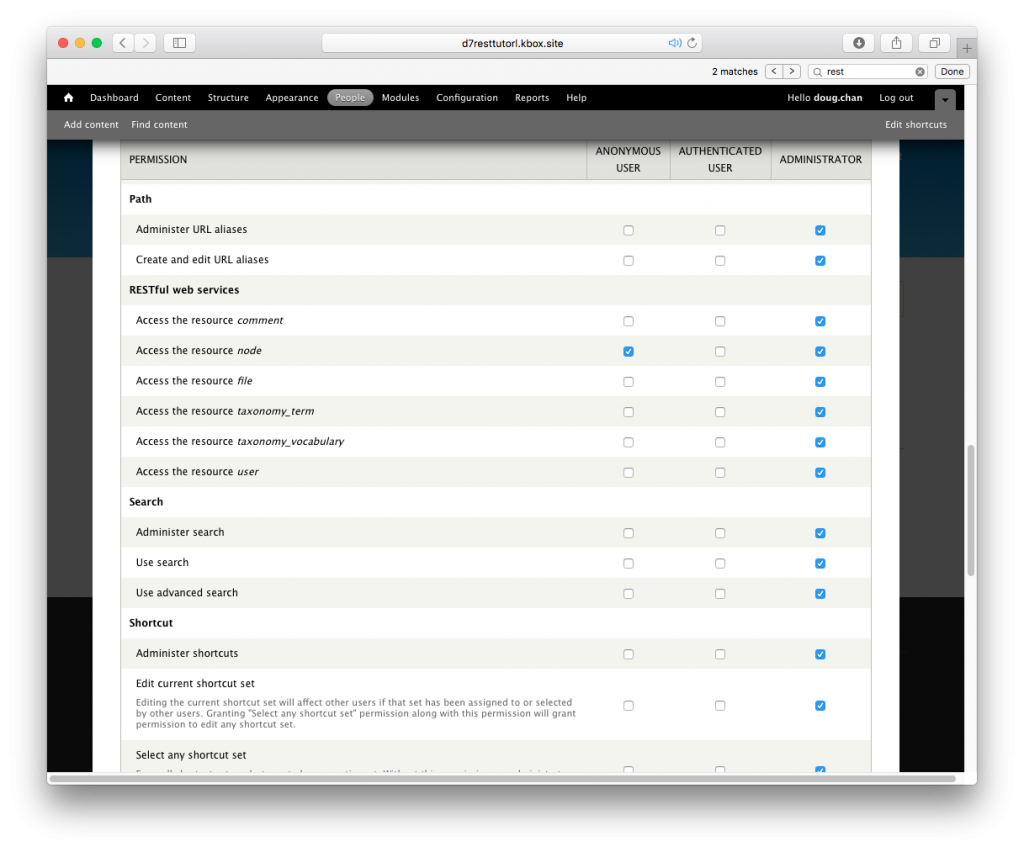
Ok, don’t fret. Go to /admin/people/permissions and scroll down to “RESTful web services”. Just for testing, checkmark “ANONYMOUS USER” under “Access the resource node” and save your changes. then try the same REST request again.
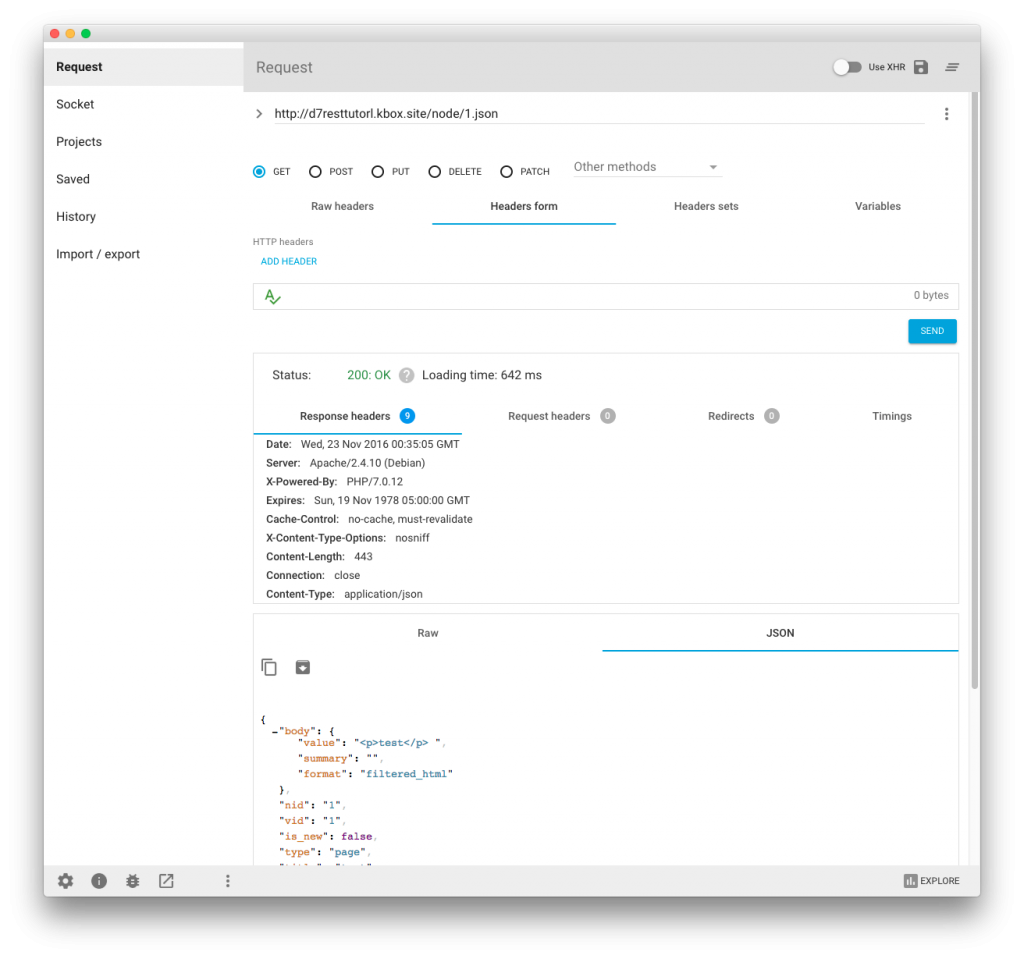
200: OK! We got JSON. Ok, so it works WITHOUT BASIC AUTHENTICATION. If you got this far, congrats. Let’s take it a step further now and add Basic Authentication.
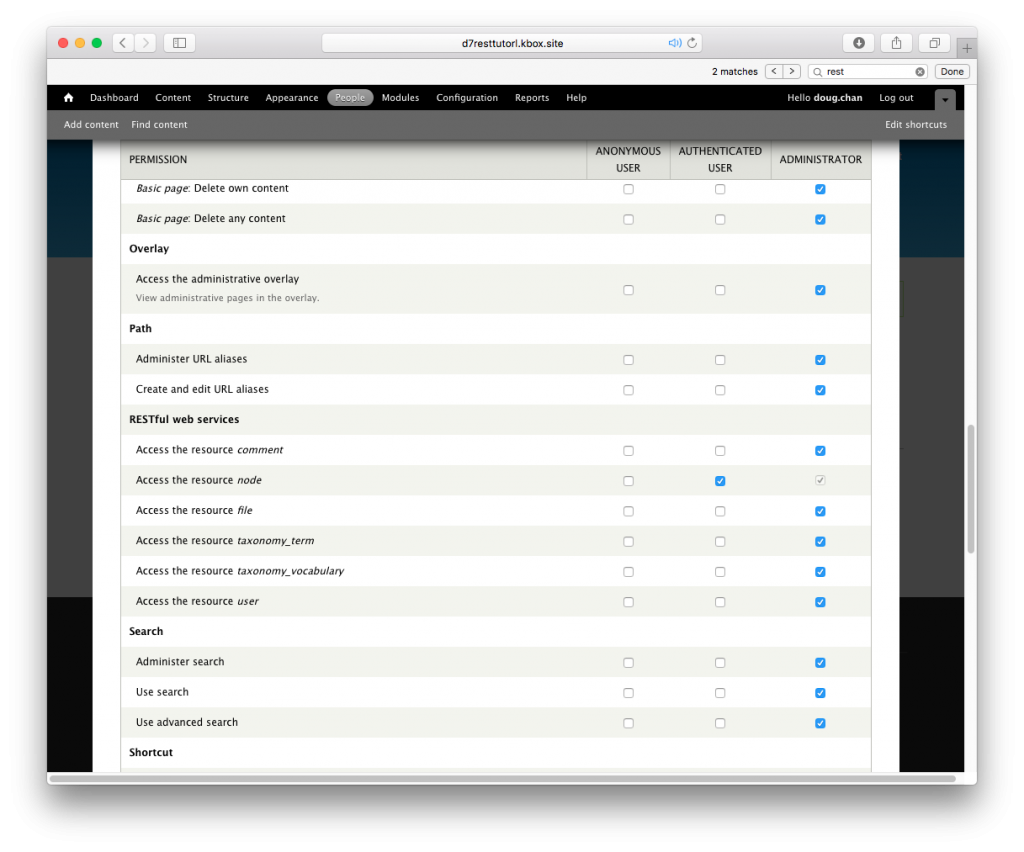
Go back to /admin/people/permissions and change that checkmark to AUTHENTICATED USER as shown below. This cuts off anonymous users from sending REST requests. Take note, when you develop a real project, you’ll probably want to create more roles for more precise permissions for your REST users, but for now, this will do.
Now add a new user at /admin/people/create – IT IS EXTREMELY IMPORTANT THAT THE USERNAME STARTS WITH ‘restws.’ !!!!! I was stuck on this for a long time because I didn’t know this. See the example below to create your user. Use whatever password you want.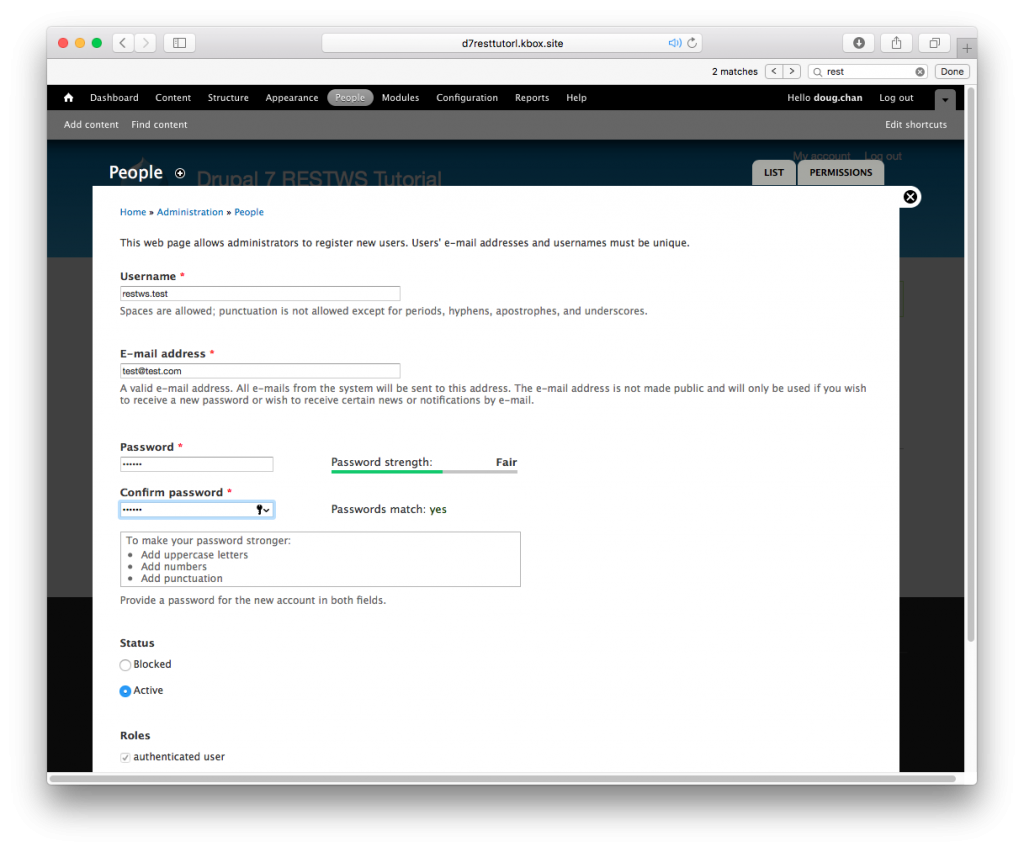
Great! Now let’s authenticate. We have to first direct our REST request to /restws/session/token with the following headers as shown below. Take note that “Authorization” is just the word “Basic” followed by a space followed by a Base64 encode of “username:password”.
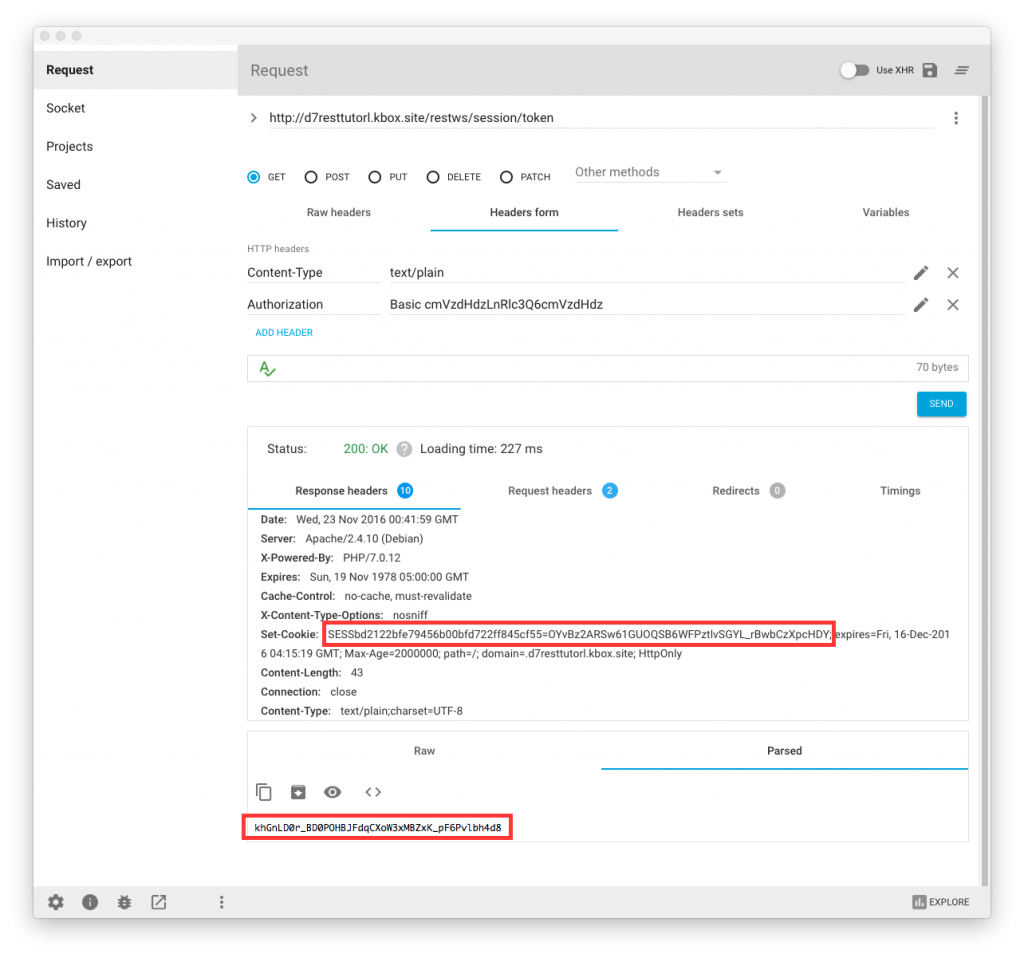
If all went well, you should get a 200 status with some really important info highlighted in red. The bottom is the X-CSRF-Token and the top is the Cookie (DO NOT include the semi-colon at the end).
Using these, you can now GET your /node/1.json and even do other things that the “restws.test” user can do based on its Drupal permissions. See the following screenshot on how to set the headers.
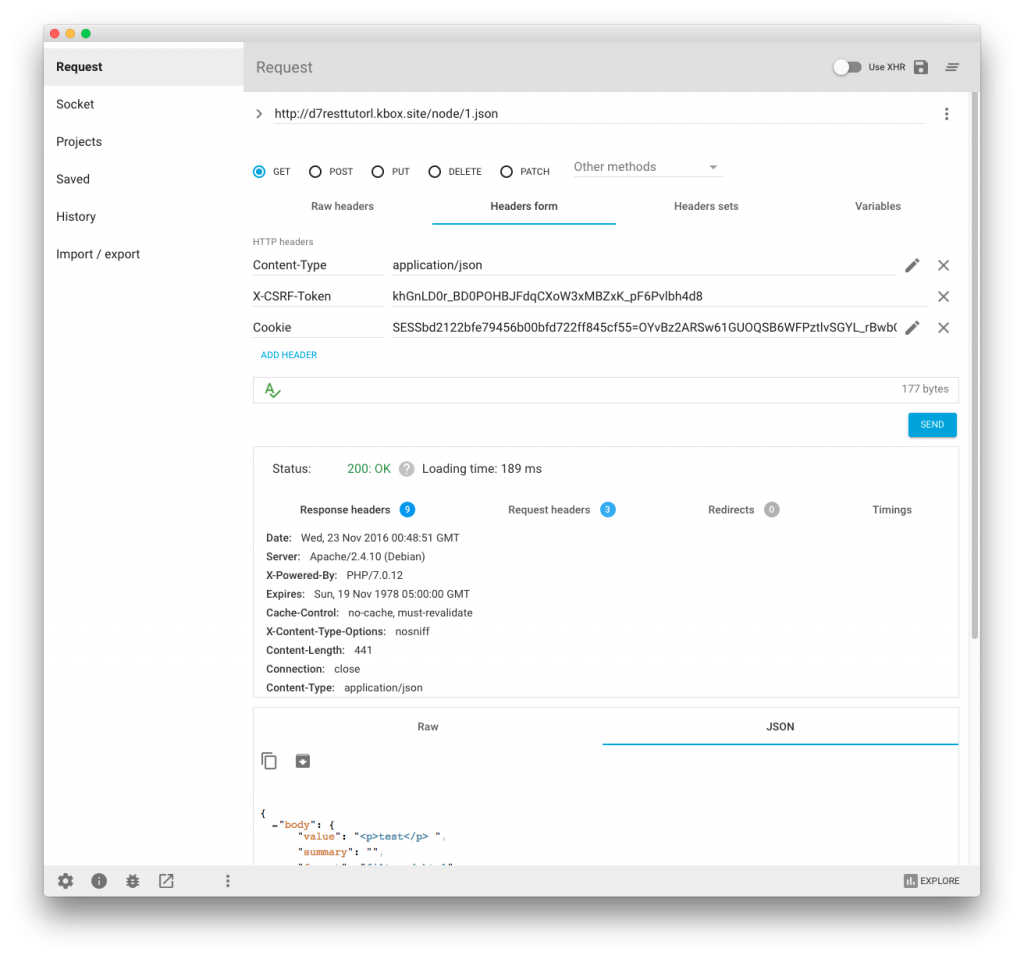
Success! Congrats, you have successfully created your first Drupal 7 REST Server with Basic Authentication. Obviously, you’re going to tie this in with another application to pull all these variables and plug them in elsewhere programmatically, but if you’ve made it this far, then hopefully I’ve saved you hours (or maybe even days) of looking through different sources to try to get everything working for the first time.